The company I was working for was throwing away legacy gear and I decided to ask for it so I can have a play around. It was a Cisco Aironet 1130AG Series AP.
I have been working with the new Cisco 887 and 881 routers with built in AP and would use the CLI to configure the wireless bit. I have also been working on Meraki products particularly the MX product line where everything is cloud base. I was thinking of adding this AP to my home network and eventually get it into my ISE lab.
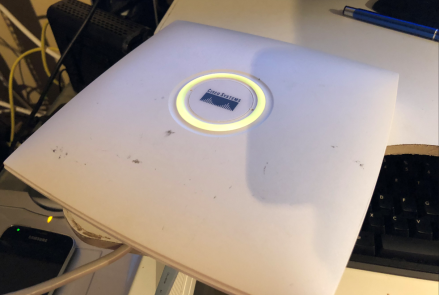
In order to get this bad boy wired up, I had to open the lid which uncovers the circuit board and nicely labelled ports. It has a fastethernet port PoE powered which is perfect for me as I have a PoE switch. Console cable on the right side of the ethernet port and even though this is an old device I felt like a kid who’s excited to get his new toy working.

Easy reset button found right next to the console port, just stick in your favorite pen and your off.

From the CLI, it boots up just like any cisco device…slow. Once it is done, it will greet you with the ap> the default enable password is Cisco, with the capital C then you can start running your favorite show commands and start exploring.

By default it will get its address from a DHCP server on your network so make sure you have setup one up. Then again there’s always that option to statically set this up with the CLI but it defeats the whole idea behind this blog.
The next step is open your browser and type the IP address assigned to the AP, this should ask you then for a username and password which is both Cisco, again with a capital C.
Word of caution before we proceed, the GUI is so slow and you have to be patient as it takes time. It is as if the lag is when the GUI tries to translate all you’ve clicked into CLI commands and applies it to the AP.

The home page gives you basic information about the AP nothing really exciting. By default the Radio’s under the Network Interfaces section is down but since this screenshot was taken after I have enabled it so disregard that for now.
Statically assigning an IP to this AP
On the left menu click on Express Set-up, once on the page, click the Static IP radio button, then assign the designated IPs for your AP.

Don’t forget to click the Apply button at the bottom of the page.
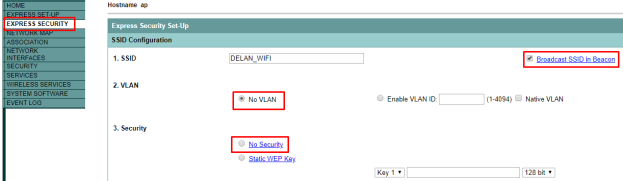
Create a SSID
On the left menu click on Express Security, enter the name of the SSID, click the Broadcast SSID in Beacon check box, tick the No VLAN unless you want to use a specific VLAN on your network and tick the No Security radio button. Later we will setup the WPA2 password for it so hang tight. Click the Apply button at the bottom of the page.
Enable the radio
Now this is the bit that will test your patience. On the left menu click Network Interfaces, then click one of the radios in my case its Radio0-802.11G. Click the Settings tab, then tick the Enable radio button. Don’t forget to click the apply button at the bottom of the page.

Again, the GUI is laggy, wait for it until the Current Status says enabled just like in my screenshot.
Configuring WPA2
Now there’s a few steps here that you need to pay attention. Go to the Security menu, then click Encryption Manager. Tick the Cipher radio button and on the drop down menu choose AES CCMP. Click Apply-All at the bottom of the page.

Again under the Security menu, click SSID Manager menu. Please wait until the Current SSID List is populated and the SSID you created earlier appears. Again patience is the key here.

Scroll down on the same page till you create the Client Authentication Key Management section. Choose Mandatory on the Key management drop down menu, tick the WPA check box. Note: Depending on the model, it will give you the option to choose WPA2, as I am using a legacy device it does not have that option. Then enter the WPA Pre-shared key.

If you scroll further down you’ll see two(2) apply button, all you have to do is click the apply button under the Mutiple BSSID Beacon Settings section.
Once that is all done, pull out your mobile device, detect the SSID you have created, enter the password and your off to the races. Happy surfing.

I’m also trying to configure a Aironet 1130AG as an access point on my home network. However, anytime I click “Apply” nothing happens. I suspect it is due to browser incompatibility. I’ve tried Firefox, Chrome, and Safari…all the same. What browser did you use?
That was IE unfortunately 🙂
thank you, I recently purchased one also and you need to remove adblock and built in browser popup blockers